3 Week 2: Corpus Construction and Modeling Digital Humanities Data
2/4/2021 Thursday
Prepare for Class:
- Flanders, Julia and Fotis Jannidis. “Data Modeling in a Digital Humanities Context.” In The Shape of Data in the Digital Humanities: Modeling Texts and Text-based Resources, edited by Julia Flanders and Fotis Jannidis, 3-25. New York: Routledge, 2019. [Course Google Drive]
- Underwood, Ted. “Algorithmic Modeling: Or, Modeling Data We Do Not Yet Understand.” In The Shape of Data in the Digital Humanities: Modeling Texts and Text-based Resources, edited by Julia Flanders and Fotis Jannidis, 250-263. New York: Routledge, 2019. [Course Google Drive]
- Martin Weisser. “Understanding Corpus Design.” In Practical Corpus Linguistics: An Introduction to Corpus‐Based Language Analysis, edited by Martin Weisser, 29-42. London: Wiley (2015). [Course Google Drive]
- Watch eScriptorium training video #1, “Introduction to eScriptorium.”:
https://www.youtube.com/watch?v=N0hSNC3YvD4
In class:
- Weekly reading report.
- Collaboratory assignment on digital text production (bring your computers!).
3.1 most recent OCR transcription model for eScriptorium
Download it here
3.2 where do I find eScriptorium?
The UMD instance of eScriptorium can be found here: http://simorgh.umd.edu:8080/
3.3 Getting started with eScriptorium 0.6.9
Tutorial written by Alix Chague, and translated by Jonathan Allen.
3.3.1 Additional Documentation:
Video demo of part of the eScriptorium features: https://escripta.hypotheses.org/escriptorium-video-gallery
Source code of eScriptorium: https://gitlab.inria.fr/scripta/escriptorium
3.3.2 Prerequisites:
Secure an account on an eScriptorium instance;
Or install a local instance of eScriptorium ( with Docker or without Docker ).
3.3.3 Summary
- Step by step
1.1. Connection to eScriptorium
1.2. Create a new document
1.2.1. Point terminology
1.2.2. Instructions
1.3. Upload images
1.3.1. Access the interface
1.3.2. Import local files
1.3.3. Import images from PDF file
1.3.4. Use an IIIF manifesto
1.4. Manually annotate documents
1.4.1. Access the interface
1.4.2. Annotate segments and areas on the image
1.4.3. Annotate the transcript
1.4.4. Aparté on the articulation of baselines , polygons and transcriptions
1.4.5. Change the order of segments
1.4.6. Semantic annotation
1.5. Import annotations
1.5.1. Import structured annotations in XML
1.5.2. Import annotations from plain text
1.6. Automatically annotate documents
1.6.1. Instructions
1.6.2. Setting up segmentation
1.7. Train models
1.8. Export data
- Manage a collaborative annotation campaign
2.1. Create a user group
2.2. Share a document with another user or with a group
2.3. Share a template with another user or with a group
3.3.4 1. Step by step
3.3.4.1 1.1. Logging into eScriptorium
You log into eScriptorium with an individual account made up of a login, a password and an email address. An account is created by the user after receiving an invitation or by the site administrator:
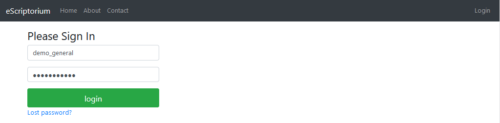
Overview of the connection interface, where you enter your login and password before clicking on "login".
Login form
Once logged on, you will see the dashboard which allows you to manage all the documents created by and shared with the account. On first login, this dashboard is empty:
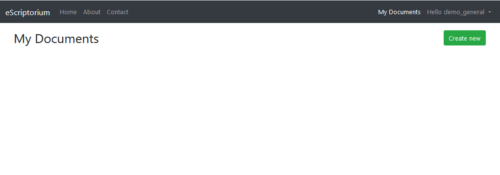
Dashboard preview, empty
3.3.4.2 1.2. Create a new document
3.3.4.2.1 1.2.1. Point terminology
A "document" is a collection of images forming a whole unit;
A " document-part" is an image--a page belonging to a document.
3.3.4.2.2 1.2.2. Instructions
To create a document, click on the “Create new” button; a new page is displayed as well as an input form:
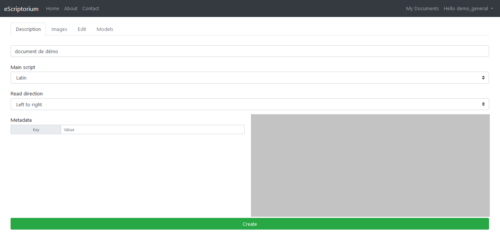
Document description tab
The document "description" tab is where you fill in the metadata.
The "Name" field is mandatory. The others are optional and can be completed later. We will come back to the “Ontology” section later.
Once the information has been entered, click on “Create” to create the document; a message is then displayed: "Document created successfully!" You can still modify the data entered: the "Create" button has been replaced by an "Update" button.

Access the document editing interface from the dashboard.
To return to this form from the dashboard, click on the “Edit” icon in front of the document.
3.3.4.3 1.3. Upload images
3.3.4.3.1 1.3.1. Access the interface
The “Images” interface is used to manage most of the tasks related to automatic image processing and imports and exports.
To access the image loading interface, click on the “Images” tab.
Navigation between the "Description" and "Images" tabs.
There are several ways to import images to the platform.
3.3.4.3.2 1.3.2. Import local files
Simply load the files using drag-and-drop or click in the box to open the file explorer. Note: you must wait until all the images are loaded before refreshing the page!

How to import images from the local file system.
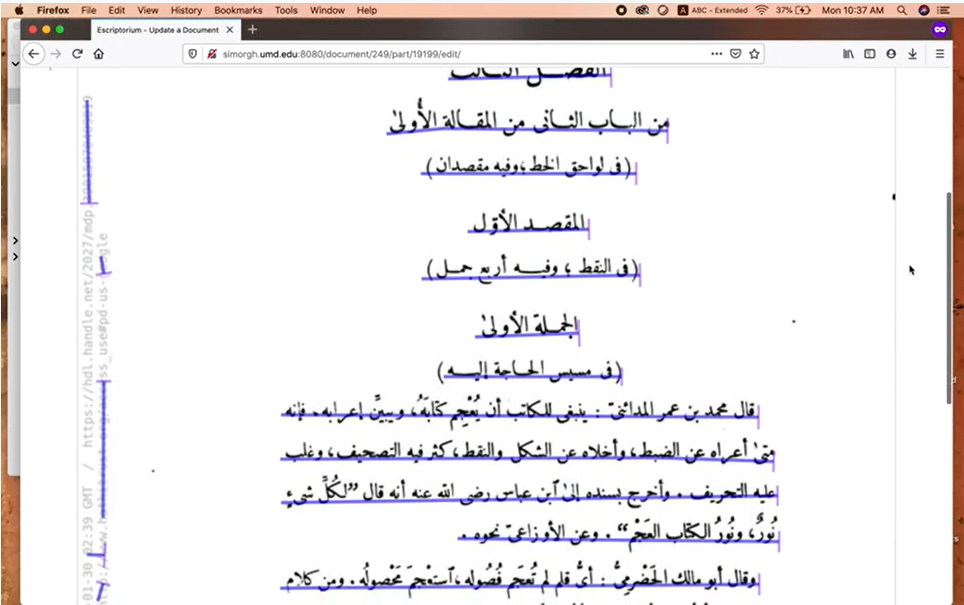
3.3.4.3.3 1.3.3. Import images from PDF file
Click on the Import button, then Images (PDF) option to load a PDF file and automatically extract the images. Please note, only the images are imported. If the PDF contains a text layer corresponding to the transcription, it is not imported.
demonstration of importing images from a PDF
3.3.4.3.4 1.3.4. Use an IIIF manifesto
Click on the Import button, then the Images (IIIF) option, then enter the url of an IIIF manifesto. All the images associated with the manifesto are then copied locally, as well as the metadata, which is visible in the “Description” tab.
Example: https://gallica.bnf.fr/iiif/ark:/12148/btv1b53026595r/manifest.json
 Demonstration of importing images through an IIIF manifesto.
3.3.4.4 1.4. Manually annotate documents
3.3.4.4.1 1.4.1. Access the interface
Manual annotation is necessary to generate ground truth data used to train models, or to correct the result of these operations. It can also be used as part of an annotation campaign that does not make use of Kraken models (eScriptorium only serves as an input environment).
The document-parts edit tab allows you to create or modify annotation elements manually. It is accessed by clicking on the “Edit” tab at the top of the page or by clicking on the “Edit” button on each “map” representing a part-document. There are several viewing panes in this tab corresponding to each possible editing task.
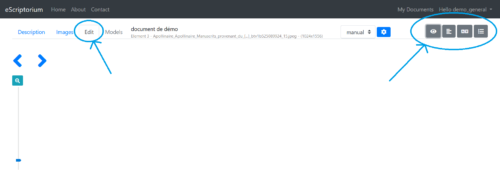
Several visualization panes can be activated within the "Edit" tab
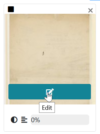
Click on the "Edit" button on each card representing a part-document
Another way to access the "Edit" tab
"Image source" allows you to display the source image;
“Segmentation” displays the segmentation editing pane;
"Transcription" displays the editing pane of the transcription in diplomatic view;
"Text" is used to display the editing pane of the transcription in text mode.
Enabling and disabling edit panes
3.3.4.4.2 1.4.2. Annotate segments and areas on the image
The segment editing pane allows you to perform several essential operations:
Drawing baselines corresponding to the locations of the text on the image in two ways:
Free route (not recommended);
Point by point plot.
Adding points on a line (select it then double-click at the point's location);
Moving one or more point (s) by a simple select-drag;
Deleting one or more point (s) on a line;
Cutting one or more lines using the scissors tool;
Joining one or more lines;
Configuring the reading direction of a line;
Activating the calculation of the polygons associated with each line (this task is automatic and managed asynchronously without any action on the part of the user after the first use).
In this pane, it is also possible to create regions (or zones ) and associate segments to them. A segment located within the perimeter of a region is therefore not automatically associated with it.
All the operations that can be carried out in this pane are detailed in a help window (to display it, click on "?"). It will thus be noted that there are many shortcuts making it possible to simplify all these operations.
3.3.4.4.3 1.4.3. Annotate the transcript
Only when there are segments and masks on the image is it possible to use the functionalities of the “Transcription” and “Text” tabs.
To add or modify a transcription associated with a segment from the “Transcription” pane, click on the corresponding zone. An input window is displayed. To record a transcription, press “Enter”: the transcription interface automatically displays the input field for the next segment.
As you type in the “Transcription” pane, the crenellated areas are replaced by text and the content of the “Text” pane changes. It is therefore also possible to modify the text from the “Text” pane and even to copy and paste several lines at once.
Manually edit the transcription from the "Transcription" pane.
3.3.4.4.4 1.4.4. A note on the articulation of baselines, polygons and transcriptions**
The baseline is the central element for storing information in the eScriptorium database. So :
It is possible to modify a baseline (remove / move / add points) without impacting the transcription;
The polygon is always calculated from the baseline, including during training
It is possible to modify the polygon manually (not recommended) without this impacting the transcription.
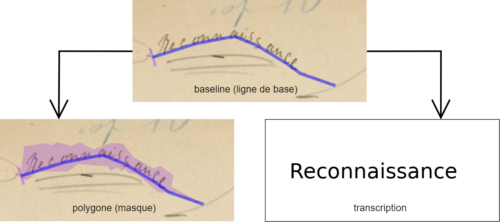
During the training of the Kraken models, the calculation of the polygons is reset: the user therefore has an interest in not intervening on the polygons and on the contrary to ensure that the baselines are drawn in such a way that the automatically generated polygons are correct. . Moreover, when manually entering ground truth data, care should be taken to transcribe only what is inside the polygon.
3.3.4.4.5 1.4.5. Changing the order of segments
The playback order of the segments is calculated automatically. You can display the order number of each segment from the “Segmentation” pane by clicking on “Toggle ordering display (L)” or from the “Text” pane where the lines are displayed in the following order.
It is possible to modify this order from the “Text” pane by clicking “Toggle sorting mode.” A simple drag and drop of the lines is then enough to carry out the modification.
Note: it is advisable to ensure the quality of the segmentation before changing the order of the lines because adding or deleting lines systematically restarts the calculation of this order, overwriting manual modifications in the process.
Edit the order of the segments from the “Text” pane
3.3.4.4.6 1.4.6. Semantic annotation
It is possible to associate labels (or tags ) with segments and regions by following an ontology pre-defined by the user from the “Description” tab. There are default tags , but it is possible to add some using the input fields (click on "+" then "Update" to add the new tag to the list) or to delete (uncheck the box in front of the tag then click on "Update").
From the “Segmentation” pane, select an area or a segment, then click on “Set the type on all selected lines / regions (T)” and choose the appropriate tag . The color of the area or line changes.
It is possible to apply a tag to several regions or segments at once: all you have to do is select several (Ctrl + click-drag or keep Ctrl pressed and click the targeted segments / regions).
Add elements in the ontology from the "Description" pane then apply the tags to the segments / regions from the "Edit" pane.
3.3.4.5 1.5. Import annotations
3.3.4.5.1 1.5.1. Import structured annotations in XML
It is possible to import segments and / or a transcript generated outside of eScriptorium. To do this, in the “Images” tab, click on the “Import / Transcription (XML)” option.
A form appears allowing you to specify a name to identify the version to import and to load the file to import. This can be an ALTO XML file, a PAGE XML file or a ZIP containing several ALTO or PAGE XML files.
It is not necessary to select beforehand which document-parts are concerned by the import: the link is made automatically according to the information contained in the XML files.
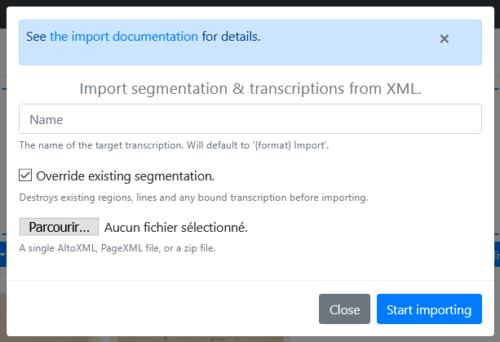
Form for configuring segmentation and / or transcription imports
Please note, after importing segments generated without Kraken / eScriptorium, it is essential to reset the polygons ( masks ) before using these documents to train a transcription model.
3.3.4.5.2 1.5.2. Import annotations from plain text
It is possible to manually import a transcription from a plain text version using the “Text” pane of the “Edit” tab. Each line break then indicates the passage to a new segment. It is therefore necessary to ensure that the reading order of the lines matches.
3.3.4.6 1.6. Automatically annotate documents
3.3.4.6.1 1.6.1. Instructions
Automatic document annotation is managed from the “Images” tab.
Select the images to annotate;
Click on “Segment” (for the detection of baselines, polygons and / or areas) or on “Transcribe” (for transcription);
A form is displayed: it allows you to load a Kraken model or to use a model already available in eScriptorium and, for segmentation, to configure the annotation.
3.3.4.6.2 1.6.2. Setting up segmentation
"Segmentation steps" allows you to manage what level of segmentation is carried out:
“Line and Regions” leads to the generation of zones (provided that the model used has been trained for this), baselines and associated polygons.
“Line Baselines and Masks” leads to the generation of baselines and associated polygons.
"Only line Masks" does not require loading a model; this option allows you to reset on the fly the calculation of the polygons associated with the baselines already present on the images.
“Regions” makes it possible to keep intact the baselines and polygons already present on the images and to generate only the zones.
"Text direction" is used to indicate the reading direction of the lines.
Overview of the options available in the automatic segmentation configuration form.
3.3.4.7 1.7. Train models
3.3.4.7.1 1.7.1. Start a workout
Training of Kraken models is started from the “Images” tab; it is tracked from the “Models” tab (inactive as long as no model other than the default model is associated with the document).
Access to training functions may be subject to authorization. It is managed from the administration interface.
To train a model, all the mobilized images / annotations must be in the same document.
Select the share documents containing the ground truth;
Click on "Train" then select the type of model to train: "Segment" for a segmentation model, "Recognizer" for a transcription model;
Fill out the form then click on "Train";
The training task is started, sometimes you have to wait before this is displayed.
When the training is finished, the user receives a notification and can access the final model from the “Models” tab. It is then possible to download the model or use it on the document.
3.3.4.7.2 1.7.2. Refine a model or start from scratch?
The training configuration form allows you to choose:
If you want to start from scratch (simply indicate the name to give to the new model that will be created);
Or if you want to refine a model (it can be loaded from the file manager, or be already present in the list of models associated with the current document).
Caution: in version 0.6.9, modifying the name of the model to train is only taken into account in the case of a model starting from zero. In order not to overwrite an already existing model, make sure to download the model locally, rename it according to the name desired for the new model, then load it into eScriptorium from the form.
3.3.4.8 1.8. Export annotations
The export of annotations is carried out from the “Images” tab.
Select the relevant part-documents;
Click on "Export" then fill out the form:
Specify the version of the transcription to export;
Specify the export format ("Alto" for XML ALTO, "Pagexml" for XML PAGE, or "Text" for plain text);
Check "Include Images" if you also want to export the images;
Click on Export and save the generated ZIP file.
3.3.5 2. Manage a collaborative annotation campaign
3.3.5.1 2.1. Create a user group (admin)
It is possible to create user groups from the administrator's dashboard (provided you have the associated rights). These groups are used to define work teams or to assign certain rights to a set of users.
It will soon be possible for a user with sufficient rights to create a team and invite other users to it.
3.3.5.2 2.2. Share a document with another user or with a group
A user can share a document with multiple users, including outside of the group (s) to which it belongs. From the "Description" tab:
Click on the "Share" button
Enter the name of the user with whom to share the document, or check his name in the list that appears
To confirm, click on "Share"
Share a document with a group or a user.